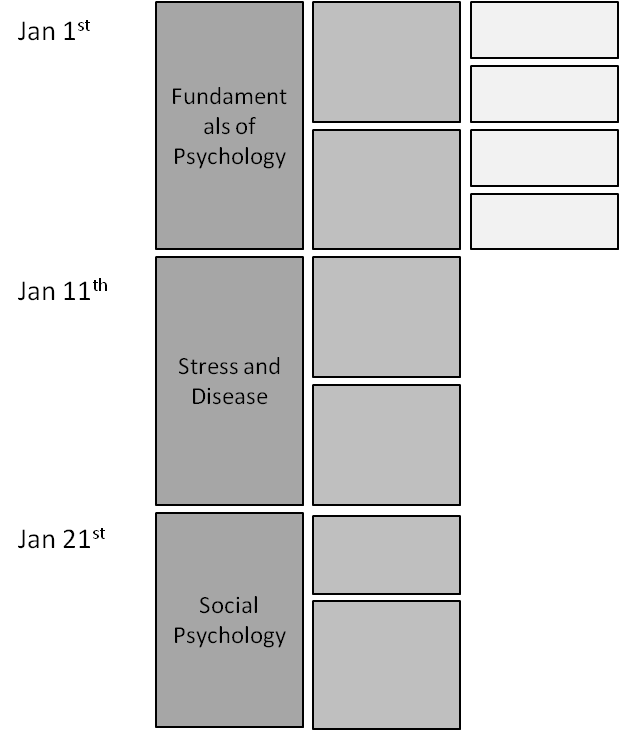
Showing posts with label kanban. Show all posts

February 09, 2014

Top Time Management Tips For Students

The time management skills and disciplines that you develop as a student can help you for the rest of your life. Those skills that we as parents help our children to develop as the same thing
Sometimes we get so many tips, as parents and as students, most of them are theory , using  simple task board , agile thinking and scrum framework will take those tips from idea to action.
Here are some tips and practices to help students (in various ages)  develop good time management skills.

January 11, 2013

Self made Kanban board by a 10 years old boy.


This 10 year old boy has been an agile@home practitioner for quite some time, and after a while, his family no longer needed the Kanban board. The communication flows and things are getting done around the house, and the boy is now used to thinking Agile.
So if he feels it's necessary to create his own Kanban task board to control his tasks better, HE decides to do it, and HE creates it.
One, day, he decided he needed that in order to manage his tasks better, he needs to create a board again. It was getting close to the start of a new school year, and the sheer amount of school-related tasks, in addition to his daily chores, made him realize he needs to manage them better, at least for a short period of time.
So he created a board. But the sticky notes kept falling off. And this 10 year old boy went off to look for a solution, all by himself. When he finished, he called me over, to show off his new creation.
Instead of sticky notes, he wrote down a list of chores.
The numbers on the list represented the tasks number which is written in the appropriate column of performance.
Task number 8 was defined as a permanent task. The task was 'Have fun!'. He even added incentives(!)


All I have to say, is 'Well done!'
Well done for coming up with an innovative solution. Well done for solving your own difficulties and thinking how to get things done in the best way for your needs.
Well done for building your own unique creative board. It's YOUR board. As long as you understand it, that's all that matters.
And having 'Fun' as a task is a really healthy approach to life.
I am so proud!


October 13, 2012

How to study for your next exam with Kanban

The best way to plan and execute a project is of course, using Agile. But planning an Agile project, even around the house, is not just about Kanban, it's also about adopting the right way of continuous planning. The GTD (Getting Things Done) approach, and being able to follow through, make conclusions and make changes, based on real life changes.

Let's take studying for exams as an excellent example. 
I still remember the pressure as a student, when you have to prep for several exams together, each one covering a whole semester. I had tons of material to cover – and of course, I was also waiting tables at the time.
It's not easy to study, work, schedule around the exam dates and cover all the material, when you sometimes have to cope with seven exams in a month. In fact, it requires a plan.
As luck would have it, we have this post about Agile to help us plan this out J

1. Create your backlog:

Use continuous planning methods –drill down to the level of detail you need at the righ moment.

” Lets think of the planning process as continuously decomposing a product vision while focusing on those features of greater priority (value) to the business. This decomposition uses just-in-time methods to prevent wasted effort on lower-priority or unneeded features. That is, we expand on features just as much as we need to according to our expectations of when we will build them (this order is determined by the value they provide to the customer).
This plan enables the team to look ahead responsibly so that large-effort activities can be broken down in small enough segments (right-sized work) and balanced against higher priority items that come up. A good release plan provides a clear visual control and obviates the need to look too far ahead and work too far in advance on future, larger features."

For starters, to cover the studying period, list the courses that you'll be taking exams on. Don’t go into detail yet – look at the first column in the chart below. 


Visualize your courses with different colors.

Visualize your exams timeline.
Order your exams according to their set date. 


Tip: Estimate the effort it will take you to study for the exam using our simple sizing technique.
This action will allow you to visualize your ability to complete those building blocks.


Now that you have your overview, start drilling down into each subject, adding elaboration where needed. Do just what you need, no more. 
(For example, if you were planning a wedding, you'd write down high level tasks (where, when, dress, guest list). You don't start writing down who sites where (or at least, not until you are much closer to the wedding day).)


·         Each course exam is broken down into reasonable study units
·         Some units are broken down further, if required.
·         You don’t have to go into minute detail on all the units – just those you need to at the time. For example, if “Fundamentals of Psychology“ is coming up, I'll break it down into smaller parts, and when I really start studying, I will break it down to even smaller tasks.

Priority level of details settings:  
When you drill down into each exam, decide how detailed you want it to be. Do you really need the details of every sub-subject?


Ready To Go:
These items are what you need to start working on right away, and so have the maximum detail necessary. They have a clear definition of 'done' (For example: pages 1-20 + answer questions 23-56)

Don't add too much detail!
Don't add detail for every task, for every subject, for every exam, right away. When the date approaches – then you can start fleshing things out with more detail.


Work with small items, meaning make sure ready items are in a level of details that is reasonable to achieve. ‘(a day size item may be enough).

Use sticky notes as a good visualization of what we need to study. It also makes sure that you can quickly change, add and adapt to change. (Agile, remember?)

2. In progress: what we actual studying.
·         Pick up items according to priority.
 Learn one topic at a time and move it along the board.
 Work on one item at a time.


3. Done
Follow the Definition Of Done. It’s not done till it’s done.


© Example taken from myagile.co.il.
And don’t forget to have fun while doing it J


October 06, 2012

Improving and managing your business opportunities flow with Kanban:


Every freelancer who manages his own business needs to manage his leads.
Yes, we can use Excel - but that’s just a software tool. It’s not a method, or a way of understanding our load, being able to control it and being able to get more efficient. I don’t know about you, but I don’t have any spare time. I have a business to grow, and having a simple tool to help us get more leads is more than just ‘nice to have’.

Luckily, everything can be done with Kanban.

Kanban is more than just a whiteboard with a flow. Kanban is about efficiency. We already know that Kanban is an amazing tool to get things done, but I find that it’s an amazing tool for my business to know where I am, and what steps I need to take next, whether it’s planning, execution or future plans.
Kanban visibility really holds an enormous value. Just by visualizing your flow you’ll see areas where you need to make adjustments, and bottlenecks become visible.

Kanban enables you to easily understand how to control your workload for each step of the flow. After all, it is pretty obvious that we won’t be able to deal with all of the leads, all the time, for all the stages of the workflow. Visualizing the load will help us solve business issues and rethink our flow of work.
Besides the ability to visualize the flow, rules and policies help make the flow efficient. Not theoretical rules - but rules that are adjusted and tailored to our day to day business activities, as shown in the flow.
So how do we do it?

1.       Understanding your workflow: As a business we need to identify the flow of events that generate opportunities from market leads  or make opportunities into money.
In our example it can look like this (with slight changes to the original business)
The following describes the steps taken from the time we have the lead to the time it become an account.


2.       A white task board reflects the flow - each new lead is a sticky note.
Start off simple, and add the leads to the board according to their process stage as tasks/goals.


Now ask yourself:
What are your bottlenecks?
Can you handle the work in each column?
Are there any wastes in the process that we can remove or should plan to remove?
Are we prioritizing correctly?

3.       Classification and visibility enhancement:  Now, start adding details to the flow to suit our visibility needs and the new changes we made to the flow. Classification and enhancements usually come when we start using the board. That’s when we see where we want to make adjustments and change things to what we want them to be.
For example: You might want to add a color for each different type of customer or type of 
opportunity, use different colors assignees or for lead source, add more columns - and so on.


There are a lot of ways to do so - you can read more about Kanban boards here.
4.       Policies management: Decide the rules - when does a lead move from one column to another? When is a lead ‘done’?

5.       Once a day, gather the team around the board, and review it.

Obviously, as time goes by, the board becomes more elaborate as making things visible helped improve the flow.

For further read of Kanban and how to manage and control your work flow :


Kanban tools

September 08, 2012

Fast writing your blog using kanban – Part #2


Last week I showed you how my example blogger friend manages his blogging and life using Kanban.

So lets dig a little deeper :

How do you do this yourself based on last week example?

Step 1: Understand Your Goals
Why are you writing your blog? For fun? To put your thoughts down on virtual paper? To gain a reputation as the best carpenter in the neighbourhood?
The reason isn’t important. What is important is that you know what the reason is.
Our blogger from last week uses the blog as a means to an end. He wants to enhance his professional reputation, and get invited to lecture on his subject.

Step 2: What Do You Need?
To succeed in reaching your goals, you need to perform certain actions. For example:
1.    We need to publish a post once or even twice a week.
2.    We need to find time to write and post to the blog without losing our day job.
3.    What happens when you go on a three week vacation? Does someone else update your blog?
4.    Do we need to factor in peer review times?
5.    We need to track our reading rates and statistics.
6.    We need to distribute the blog posts through online channels.
7.    We want to be able to answer reader questions and post requests.
8.    We want to add more blogs in the future.

Starting off using Kanban to manage your flow may be hard at the beginning, but in few weeks you’ll get the hang of it.

Step 3: Based on your needs , go and Visualize your flow.
This is a crucial step. Visibility is a powerful aid to getting things done. Remember, the flow we build in the beginning can change - in fact, it HAS to change, as our needs change or our view of our actual performance changes. When we think ‘effective and ongoing improvement’, we change things.
So put on your blogger hat, and Map the steps you do when writing and publishing a post. Once you’ve put down this basic flow, ask yourself what you’ve forgotten. Go over all the steps. 


But - Don’t forget to keep it simple!
Elaborate your flow..

1. 

2. 


3.


This flow shows the step by step path a blogger takes from a concept to a finalised blog post.

So where do we visualize the flow ? Set a Task Flow board.
Usually I would recommend a white board and some sticky notes . This time. I’d like to show you the flow using a software tool. As we have to write documents and move ideas , pics and documents around, it’s so much easier to use software.

Each post will be a card moving on this board columns according to its actual state.
Prioritize your posts.
Start working and move posts around the board.


look at your flow and ask yourself  does it mach your needs? does it fit your vision ?

Step 4 : Limit work in progress (The work you began and didn't finish yet) :
It means , understand your limits, and follow them.
When we acceded the number of tasks/ work we can handle , we end out doing nothing valuable. in fact , we end investing more effort then expected. We need to  Focus on the important & Challenges . This way, instead of dealing with things that aren’t getting done, we focus on what’s really important, and have time to learn new skills.

Keep in mind, that in some steps of your work  you want to limit yourself from getting overloaded or with mach more tasks that you can handle. Limiting yourself prevents you from overloading, and getting stuck with a lot of unfinished writing that cannot be published.


First, Work in small chunks. It means , you don’t have to have an idea and then elaborate it fully to 3000 words and all in one time.

As our blogger did, work on small slices of time every day. Take small chunks of time and invest them in small flow steps every day.  After all, you also want to be with your family, and you’ve got your job to think about. Doing some research for half an hour every night is a good start.
In fact, the flow reflects this need to work in small chunks. We have a chunk for ideas, then a chunk to elaborate on them, then a chunk to review, and so on.

Backlog
Don’t limit the backlog. Got an idea? Stick it here.

Ready
This one is a bit tricky. The limit is for the minimum, not the maximum number of ready posts. It’s best not to count on having just one post ready to go. Make sure you have enough posts ready to keep the flow moving. So having 3 posts ready at any given time, is the policy for this column.

Review
For our blogger the maximum number of posts ready for review is two They can’t do anymore.

Published
Once a week. This limit is a time constraint. You can change it, but you don’t want to inundate your audience.

Distributed
Two days after publication. This is a policy and limitation we need to keep in our blogger world.

Follow
This column starts day after the publication and is followed for a week . We need to know that we track each post, so that we can improve on them in the future.

Step 5: Make process policies explicit:
Set up your rules and guidelines of your work  Understand your needs and make sure to follow the rules. the policies will define when and why a ticket is move from one column to another. write them down .Change the rules when reality changes. 
For example,
Make sure to prepare your peer for the next blog and priority.
What is the best time to write your post? During the weekend? The evening? When is the best time to review it?

Step 6: Improve:
Moving forward from task to task without looking into your performance will bring little or no improvement. We want to avoid doing the same mistakes over and over again. We want to be efficient. For example, if you find yourself correcting post after post, after they are reviewed, ask yourself how can you do it better. Maybe you’re just using the wrong file format. So change your formatting from now on.
Improving is a key. Take a look at your performance. Are you satisfied with the results? Try to improve and change accordingly. don't be afraid to change  , try and learn from the change (PDCA). We may need to change our flow or policies, our audience or reviewers. What brings better results?  This is a process done all the time.

Measure, monitor  and manage your flow:
Our blogger wants to have a size of that’s that he can handle throe the process steps easily.  Measure your ability to write  – 600-1600 words in a week. Is it small enough? Or should your posts be smaller. Can the average reader read 3,000 words? Isn't it too big? Do we need to change the flow as a result?
Can you keep on posting a blog once a week as you need to? If not, what is holding you back? What are the relevant changes in the flow you want to add so you will be able to keep publishing a post every once a week?

We can measure the cycle time of writing a blog. That means, from when you start elaborating an idea (a) to the time it is distributed (b).
Now, is the cycle important? The answer is probably yes. Lets say that you are approached by an author, who wants you to review his book. Knowing the length of your cycle means that you can give an estimation as to how long the post will take. Will it be published in two weeks? Four?

The main principle is - Improve. Know your field and improve. How many visitors come and read your blog? What type of blog brought the most visitors? Does your flow as it is have an impact over this data?

**The tool chosen for this presentation is swift Kanban, it has a free interface easy to use and professionally fit to our blogging needs.